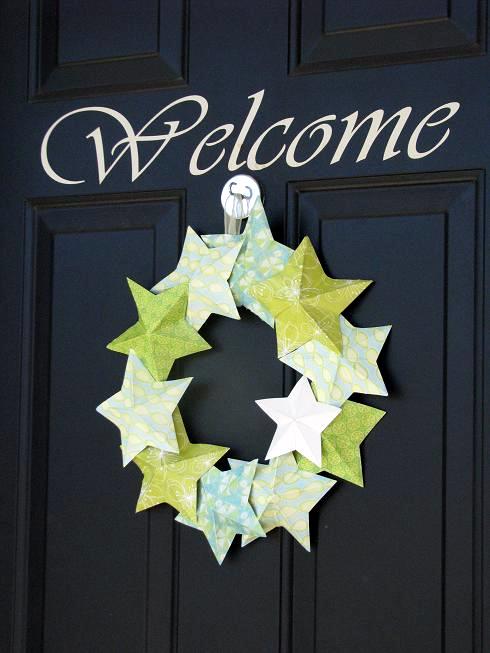
Friday, July 2, 2010

Summer 3-D Star Wreath


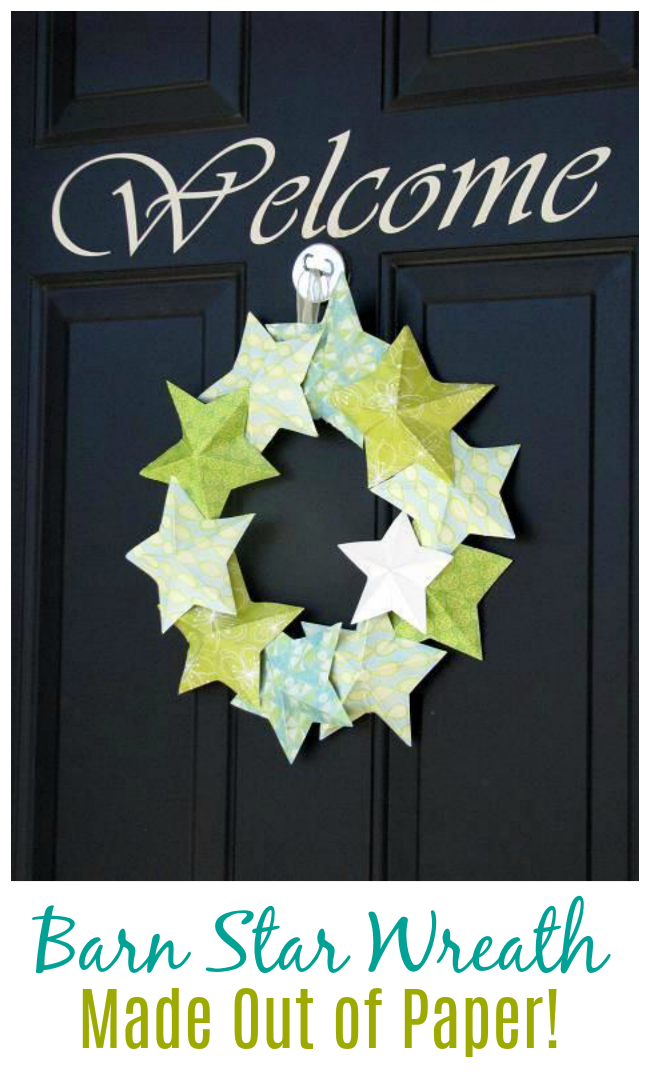
Aaron and I made this fun cardstock wreath for our front door. Nice and bright with summer colors and easy to customize for any season. How cute would it be in red, white and blue for the 4th of July, or made with fun Christmas paper?


Here is how to make your own!

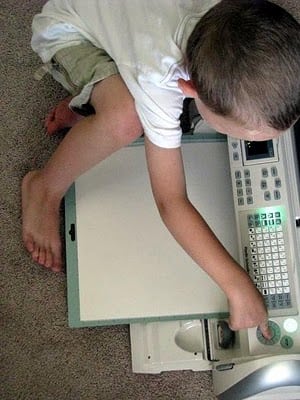
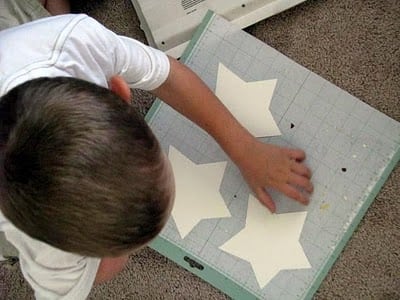
Using your scissors/cutting tool/machine, cut out 12 {5"} stars. The number of stars you will need can vary, but for a 10" wreath, 12 stars is a nice amount to start with. You can layer it more or less from there.

{We use the Plantin Schoolbook cricut cartridge. We made them using the "roly poly" feature so that they would be wide. Sturdy cardstock works best for making these.}

Now we'll show you how to make your stars 3-D!
  Below is one all ready to be scored. The white cardstock is under the bright paper.


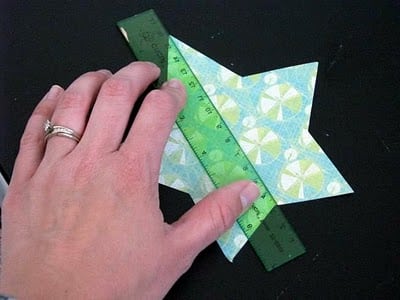
Score your star 5 times. Once for each point. Start at the point and score directly across to the center between the two bottom points. Rotate star and score again until each point has been scored.

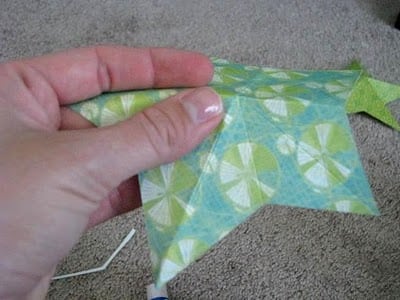
Fold each scored line and crease firmly.

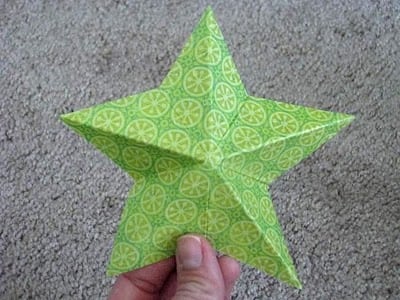
There is your 3-D star! Now finish up the rest of them and you'll be ready to assemble the wreath or use them for any number of fun little projects.

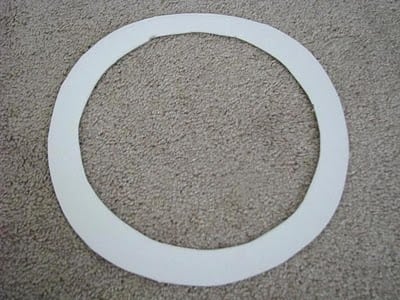
 Cut out a 10" ring for your wreath base using thin cardboard.

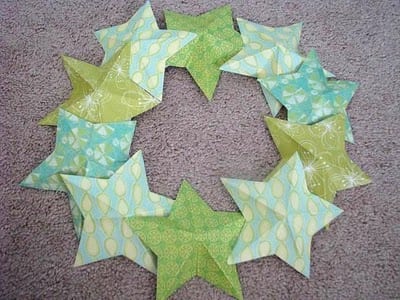
Hot glue the stars to the ring and eachother. Since they stick out, you can't glue them flat, so just apply a small amount of glue to the points where the stars overlap eachother. Don't skimp on the glue.

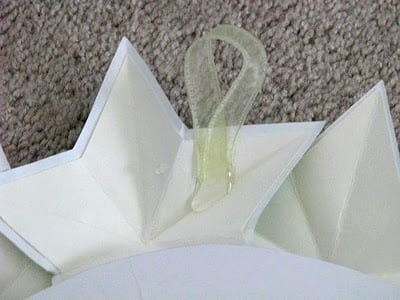
Attach a ribbon for hanging.

That's it! Perfect for summer. I just love free projects!
Pin It!

49 comments:

  1. Awesome! It looks easy enough...I only hope I can do it!

    ReplyDelete
  2. That's fabulous. I hope I can do that so I can put a red white and blue one on my door. Thanks for the tutorial.
    Happy 4th of July weekend.

    ReplyDelete
  3. Your wreath turned out great! Love those colors. You are right... would be gorgeous for any season.

    ReplyDelete
  4. This is sooo cute!! I want to make them for all seasons...Maybe I could do a "Twilight" one...hmmmm...I'm so joking...I couldn't resist :) ♥ya Brandy...I think a red, white & blue one would be really cute.

    ReplyDelete
  5. Ooh! I love your summery wreath! And those colors are PERFECT together! You did a wonderful job!!

    ReplyDelete
  6. This is too cute! I really need to make a wreath for our apartment door (we live in a residence hall...so a door decoration is all we have in terms of "outdoor decor" haha)

    Just wanted to stop by and let you know that I've passed an award along to you for being a Versatile Blogger! Stop by my latest blog entry to pick it up! :) http://wendyandadam.blogspot.com/2010/07/we-just-got-award.html

    ReplyDelete
  7. I love the colors of the paper you used!! Such a cute idea!

    ReplyDelete
  8. So cute! I love the colors!

    ReplyDelete
  9. I adore this idea!!! Thank you so much for sharing.

    ReplyDelete
  10. This is such a terrific idea - and executed so beautifully! Love this!

    ReplyDelete
  11. Looks great. I love the different shades of green.

    ReplyDelete
  12. Oh I adore this project. It is going in my style file for sure!

    Happy 4th of July!

    ReplyDelete
  13. What a super fun idea. It could be applied in so many ways. Thank you for sharing.

    ReplyDelete
  14. I REEEEALLY Love your wreath!! Happy 4th!

    T.bird

    ReplyDelete
  15. Great wreath. Thanks for sharing.

    ReplyDelete
  16. love this!! come on over and link up to MMM :)

    ReplyDelete
  17. I love this!! That's awesome, great idea!

    ReplyDelete
  18. What a great idea! I love the colors you chose for the wreath! Thanks for the tutorial!

    ReplyDelete
  19. Love it! I am constantly changing my front door wreath for different occasions. Thanks for the idea.

    ReplyDelete
  20. It looks so great and seems like it took not a lot of time. Those are my favorite projects

    ReplyDelete
  21. This is just gorgeous! Love it! I'll have to make one, you've totally inspired me! I'm your 600th follower! Your blog is fantastic!

    ReplyDelete
  22. Too cute!! I would have never guessed it was made from cardstock! :)

    ReplyDelete
  23. Sooooo cute!
    Thanks for linking up!
    ~Liz

    ReplyDelete
  24. oh that is so cute! I will have to make this one!

    ReplyDelete
  25. I love this! Great party idea too

    ReplyDelete
  26. I'm going to feature this on Saturday! Come grab a "I've been featured" button at my blog if you'd like! I love this!

    ReplyDelete
  27. I'm going to do this over the weekend for my "Flat Out Free" challenge -- thank you!

    ReplyDelete
  28. I saw your feature over at Keeping It Simple. I love, love, love this wreath. I can't wait to try it myself. Thanks for posting!!!

    ReplyDelete
  29. Very cute! What a fun project to do with children.

    visiting from PonyTails and FishScales

    ReplyDelete
  30. That is super cute!! Thanks for showing us how it is done.
    ~Cindy~

    ReplyDelete
  31. This is so cute! Love the colors!
    I'd love if you linked this up to my Scrappy Saturdays! http://www.scrappy-gifts.com/2010/06/19th-scrappy-saturdays.html

    ReplyDelete
  32. This looks great! I love your color choice.

    ReplyDelete
  33. Did you make your "Welcome" w/ the cricut???

    ReplyDelete
  34. So sweet! Love all of your blog projects. I'm a new follower. :)

    ReplyDelete
  35. Hi!

    Wanted you to know I posted a link to this tutorial today on my blog.

    nancy Ward
    PaperFriendly
    http://www.nancywardcrafts.com

    ReplyDelete
  36. CUTE Wreath! Very Kid Friendly to make also - LOVE :)

    ReplyDelete
  37. Oh no way! I love it! And SO much cheaper than buying a foam wreath and a bunch felt! haha that seems to be the trend lately. Thanks for linking this up at Fine Finds Friday! I'm going to feature it soon, i'll let you know!

    ReplyDelete
  38. Very nice! I love your color choices, but you are so right, the possibilities of this pattern are endless. Thanks for sharing!

    ReplyDelete
  39. you're featured today!www.smallfineprint.com

    ReplyDelete
  40. I love how the folding makes the stars pop. Such a simple, striking wreath.

    ReplyDelete
  41. I made your wreath the other day. Just thought you may want to see:

    http://thewhitakerswindow.blogspot.com/2011/06/summer-decor.html

    thanks for posting this, I LOVE it. I will probabyl make this again in the future - soooo easy!! thanks again.

    ReplyDelete
  42. Your fan club can't help but grow! I had to try it, too! You do such a great job with everything... great ideas, photos,instructions! Thank you!

    I wasn't sure it would work without a cutting machine, but you were right, it did! I still like yours better though:

    http://crackofdawncrafts.blogspot.com/2011/07/independence-day-fun-collection-of-four.html

    ReplyDelete
  43. I made two of these for Christmas last year

    http://justmejuliejulie.blogspot.com/2010/12/copy-cat-christmas-star-wreath.html

    http://justmejuliejulie.blogspot.com/2010/12/another-star-wreath-and-biggest-loser.html

    They are fun to make!

    ReplyDelete
  44. Fun and easy! Thanks for sharing! (found via Pinterest)
    ~Heidi

    ReplyDelete
  45. Hey i adore this and i am going to make it, just wondering what size on the cricut you had it set for?

    ReplyDelete
  46. Hey i adore this and i am going to make it, just wondering what size on the cricut you had it set for?

    ReplyDelete

Thank you for taking the time to comment! I read each and every one and will try to respond to any questions you may have. If you would like a response, make sure that your blogger profile has a link to contact you. Thanks! I reserve the right to delete any comments that I feel do not contribute our blog and its contents.