My inspiration for this project originated from a Patemm changing pad.
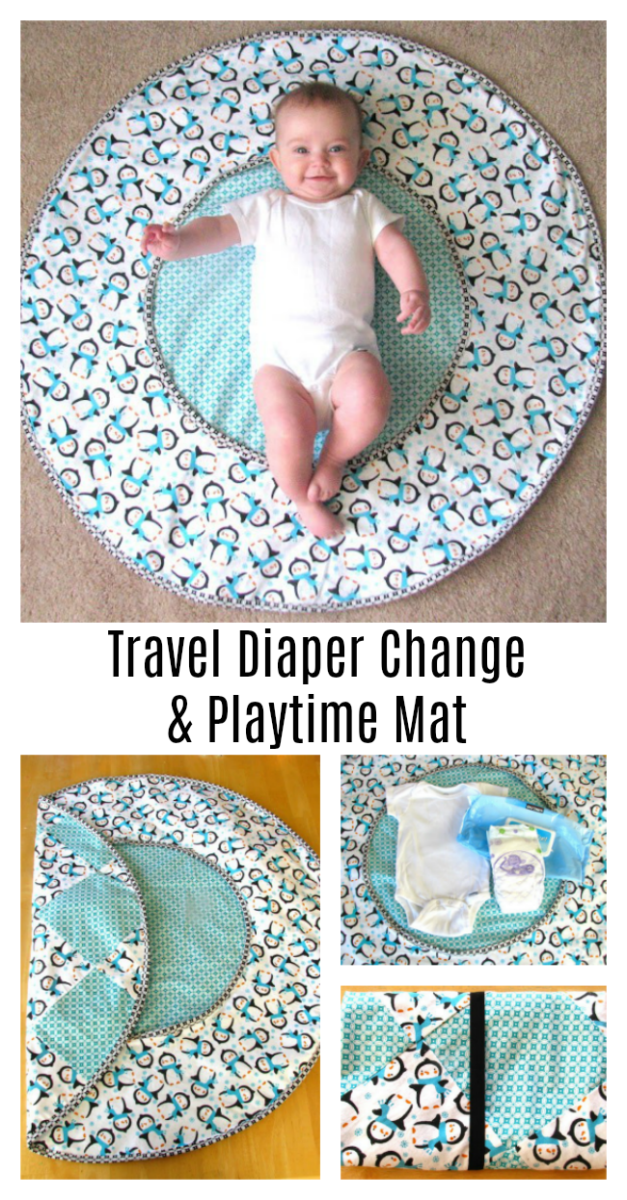
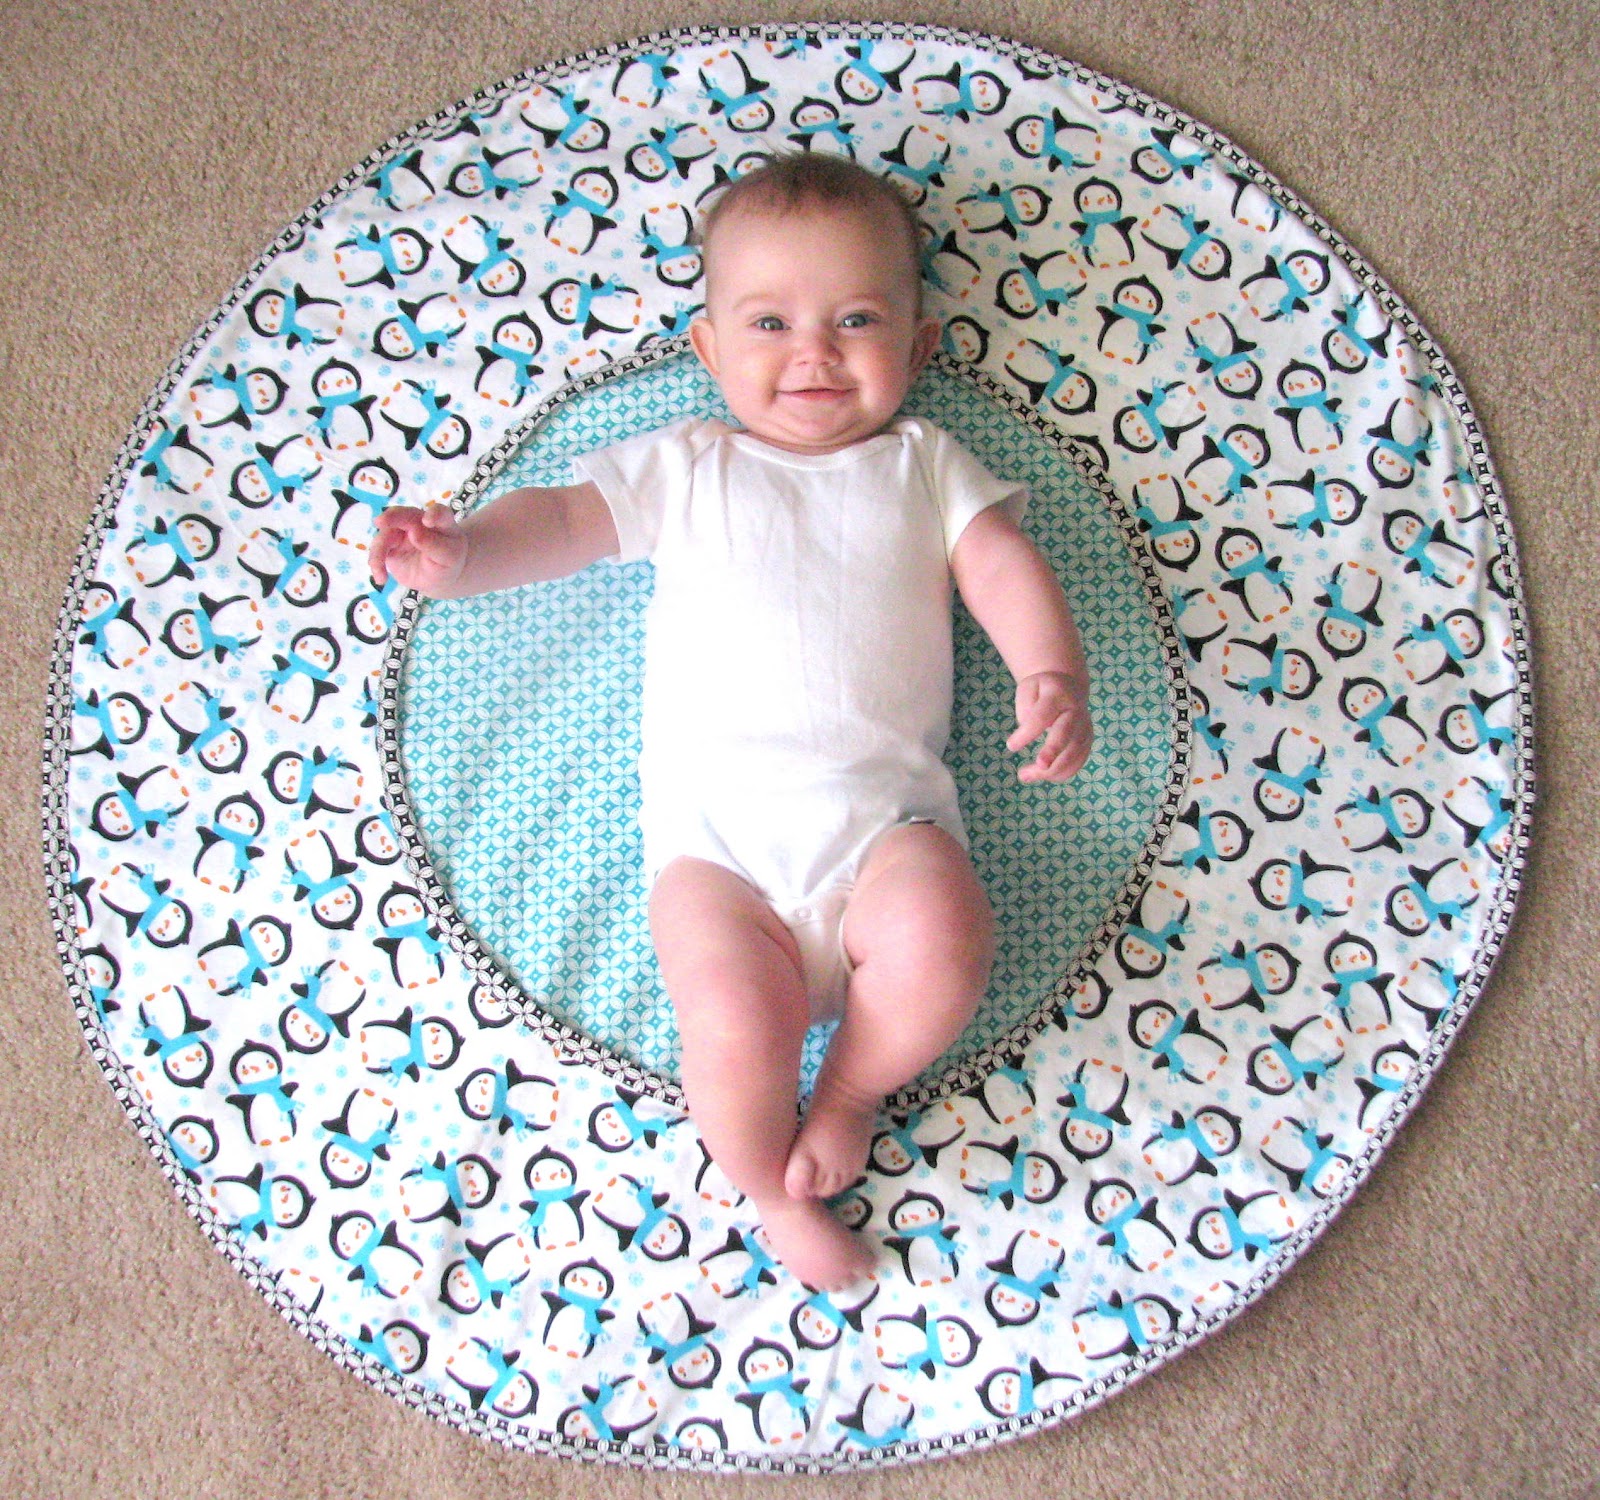
DIY Travel Diaper Changing Pad & Playtime Mat
How To Make A Folding Diaper Changing Mat
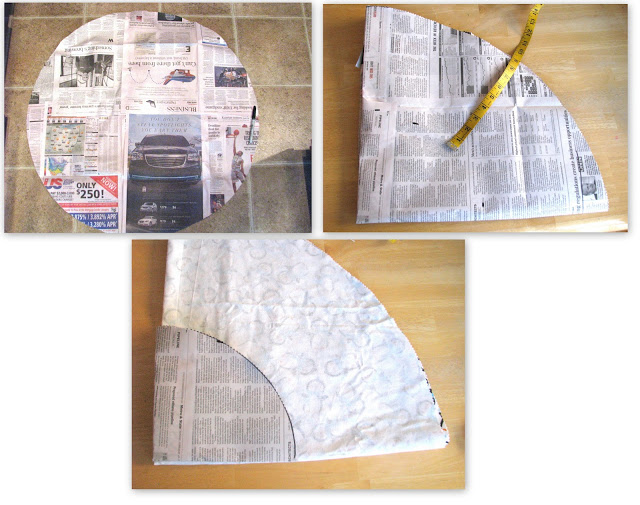
How To Make a Circular Pattern
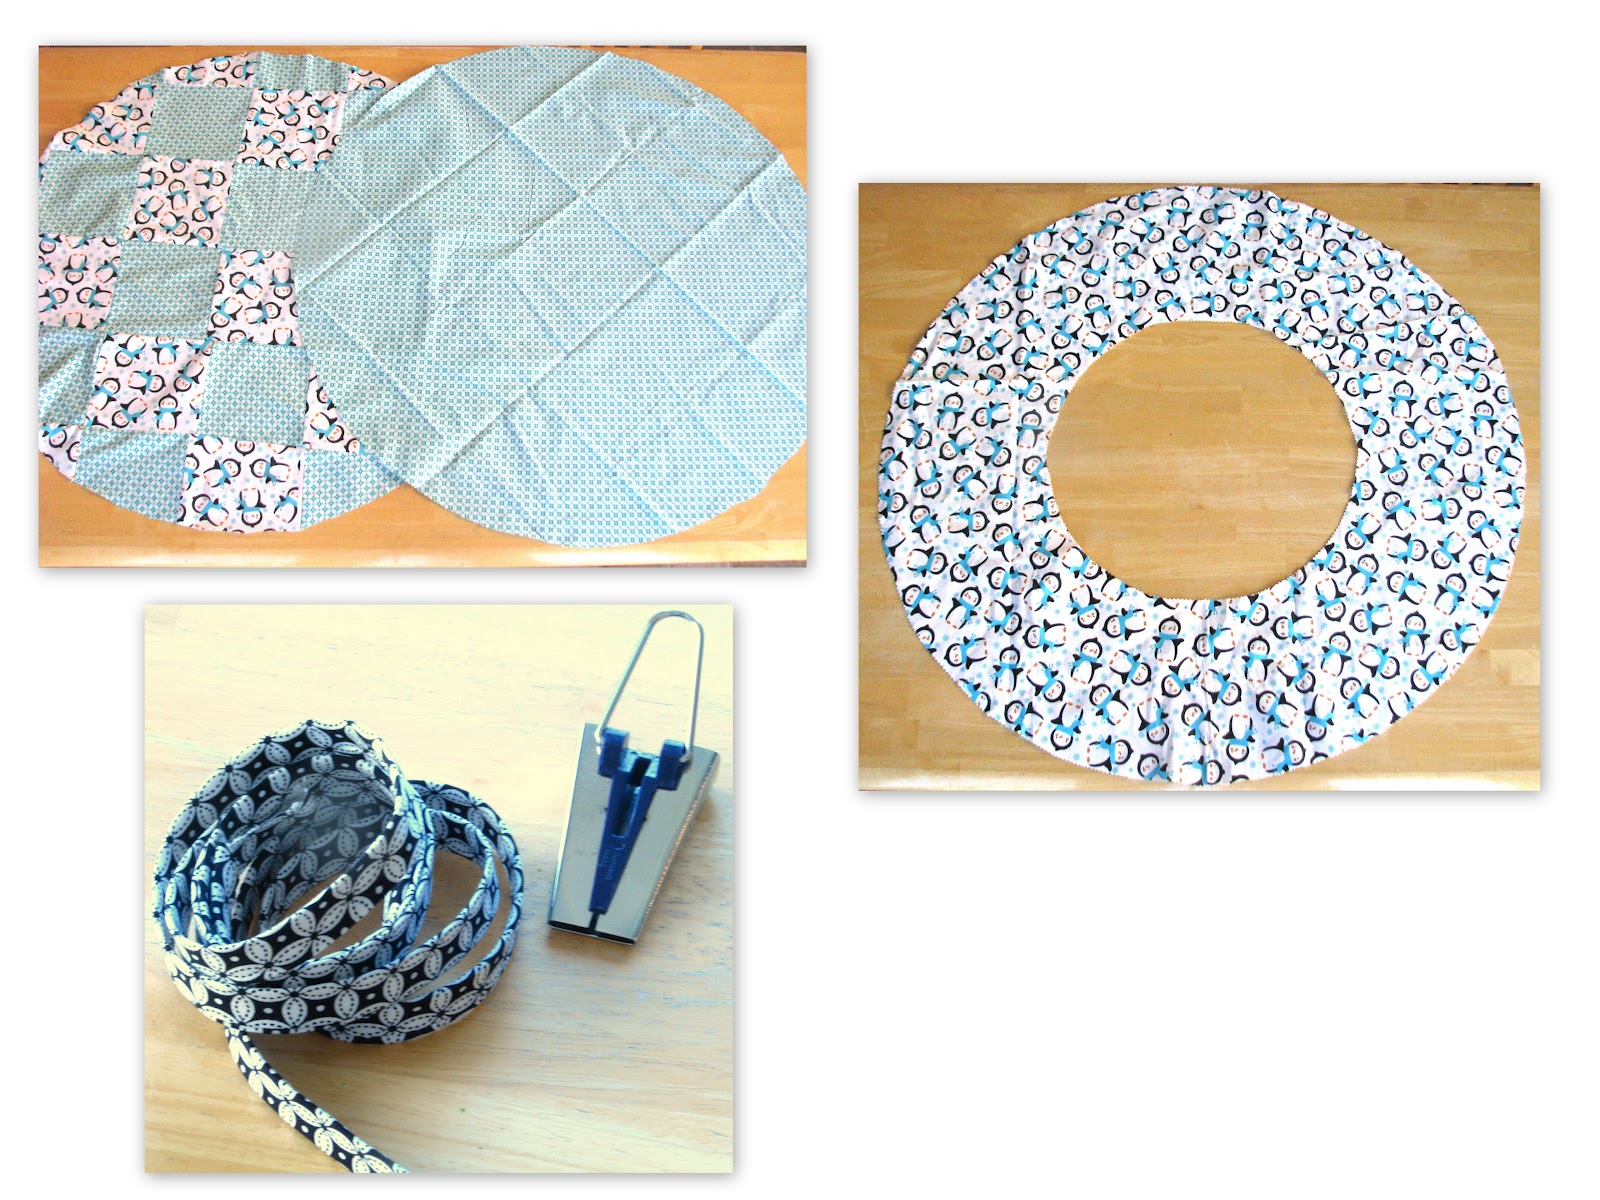
Bias Tape
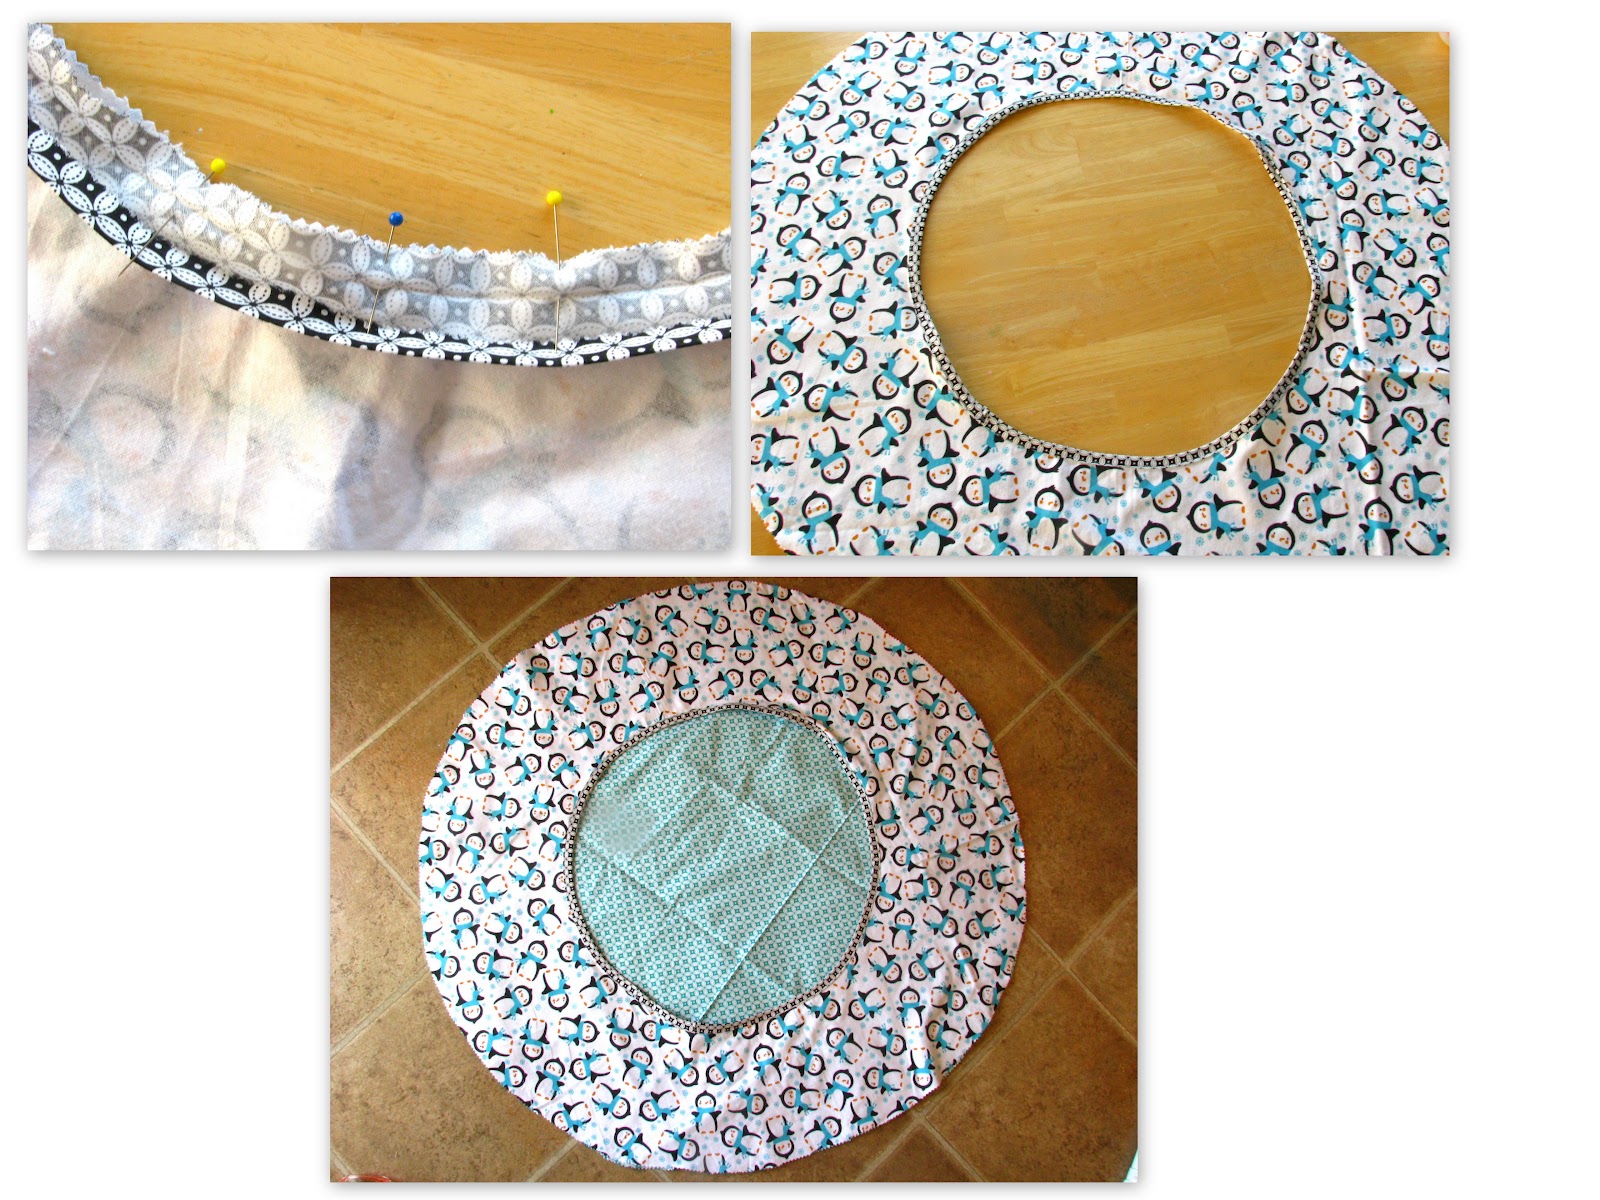
Sewing On Bias Tape
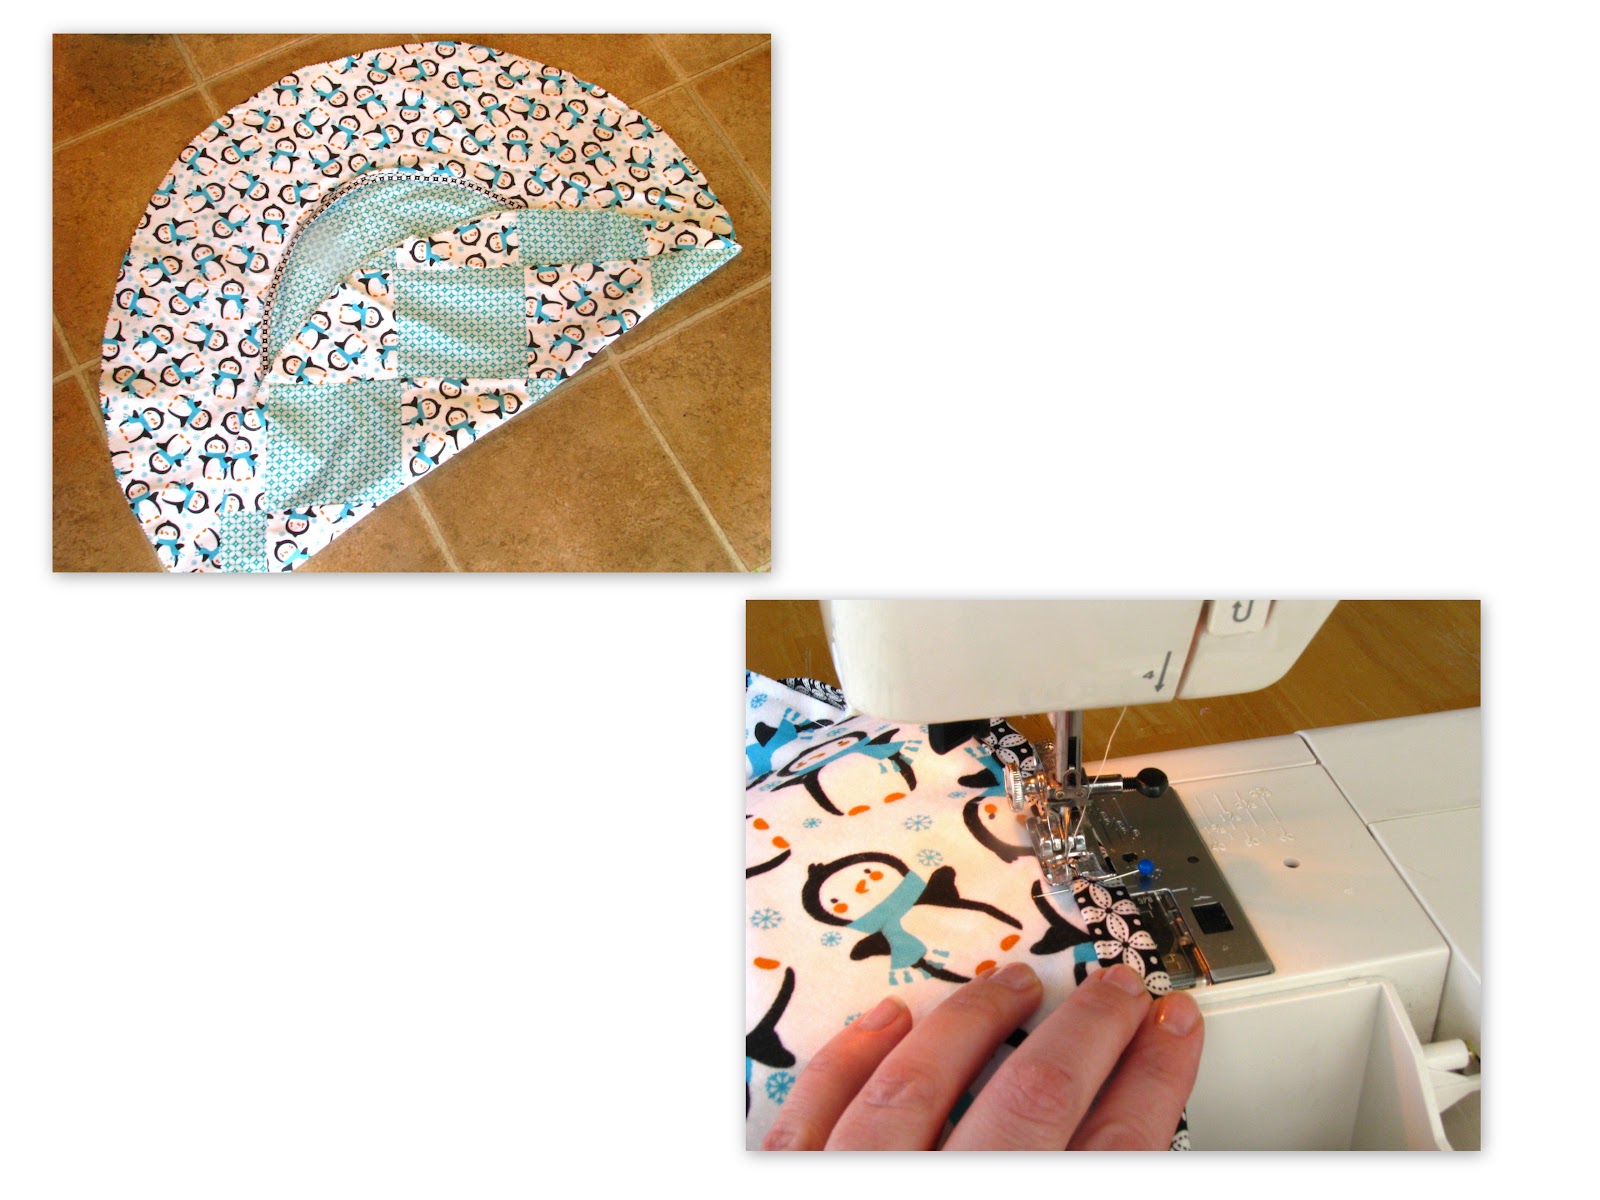
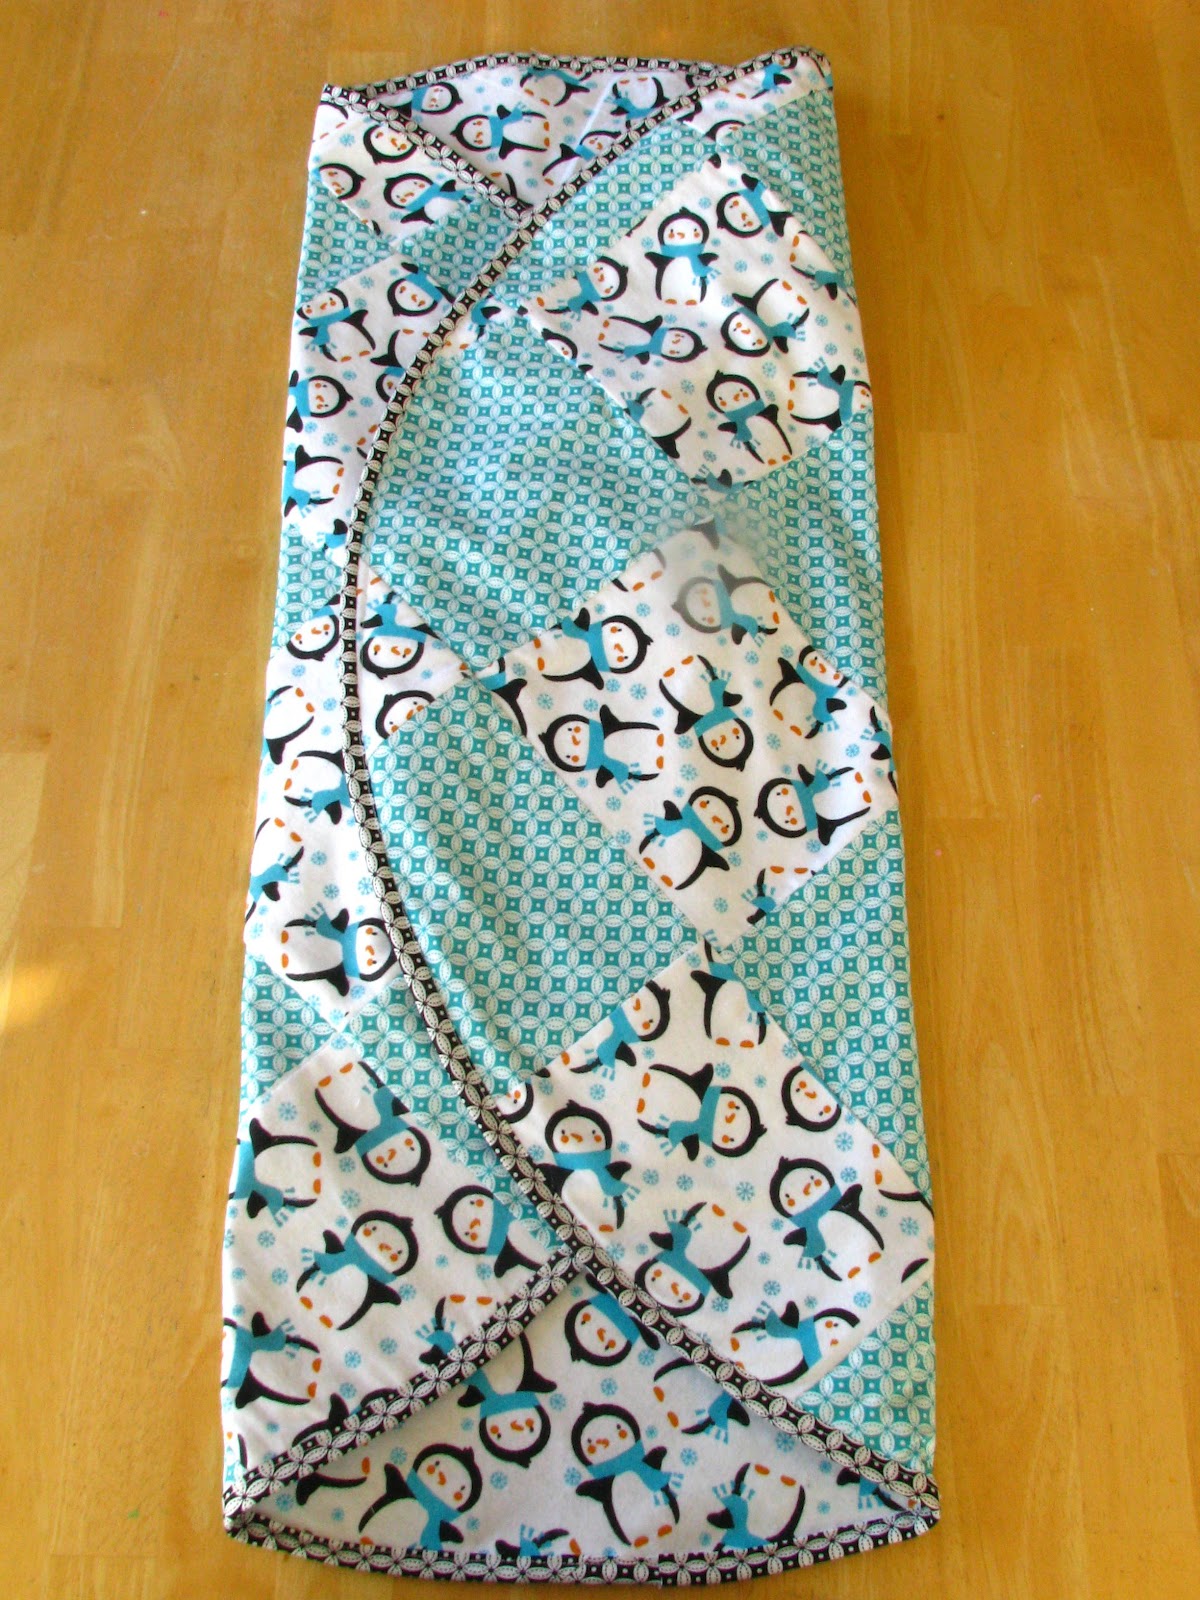
Easy Folds for Changing Mat
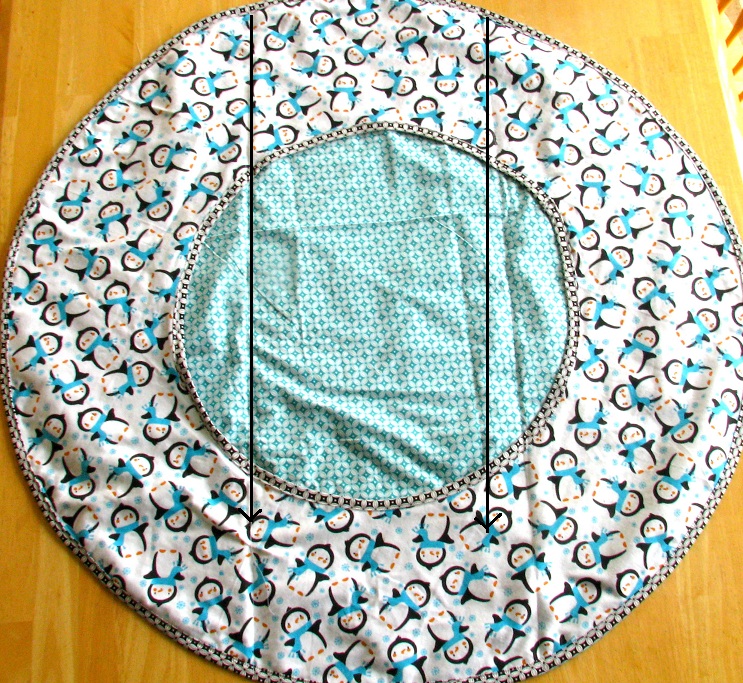
To create easy fold lines and sections for your items, fold your pad in thirds. Starting with the left, then the right and mark your folds with a pin. And iron your fold so that you can see it clearly to stitch. Pin along the stitch line, if necessary, to see it better. Stitch through all thicknesses starting at the top and going down on both lines (See illustration below) all the way to the bottom bias tape of your mat. This will create 4 sections. The top and bottom sections will be approx. 8×12″ and the sides approx. 8×24″. It is hard to see the thread in the photos, but it does create 4 nice sections and makes it easier to fold up the changing pad.
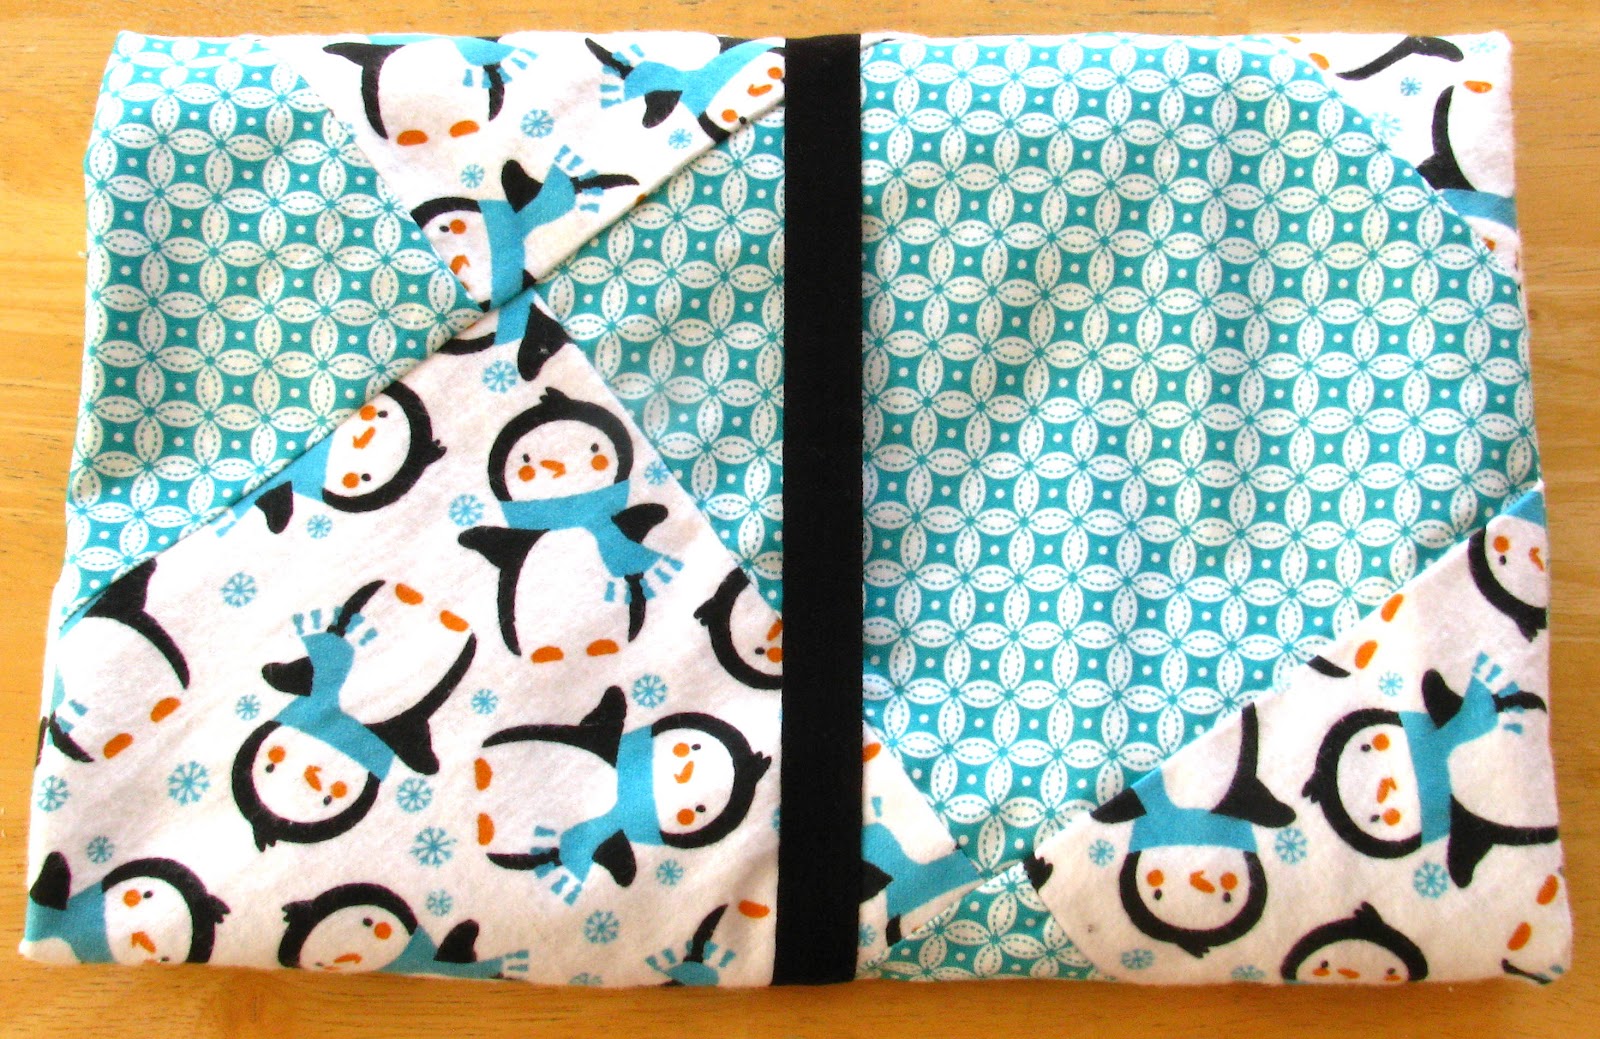
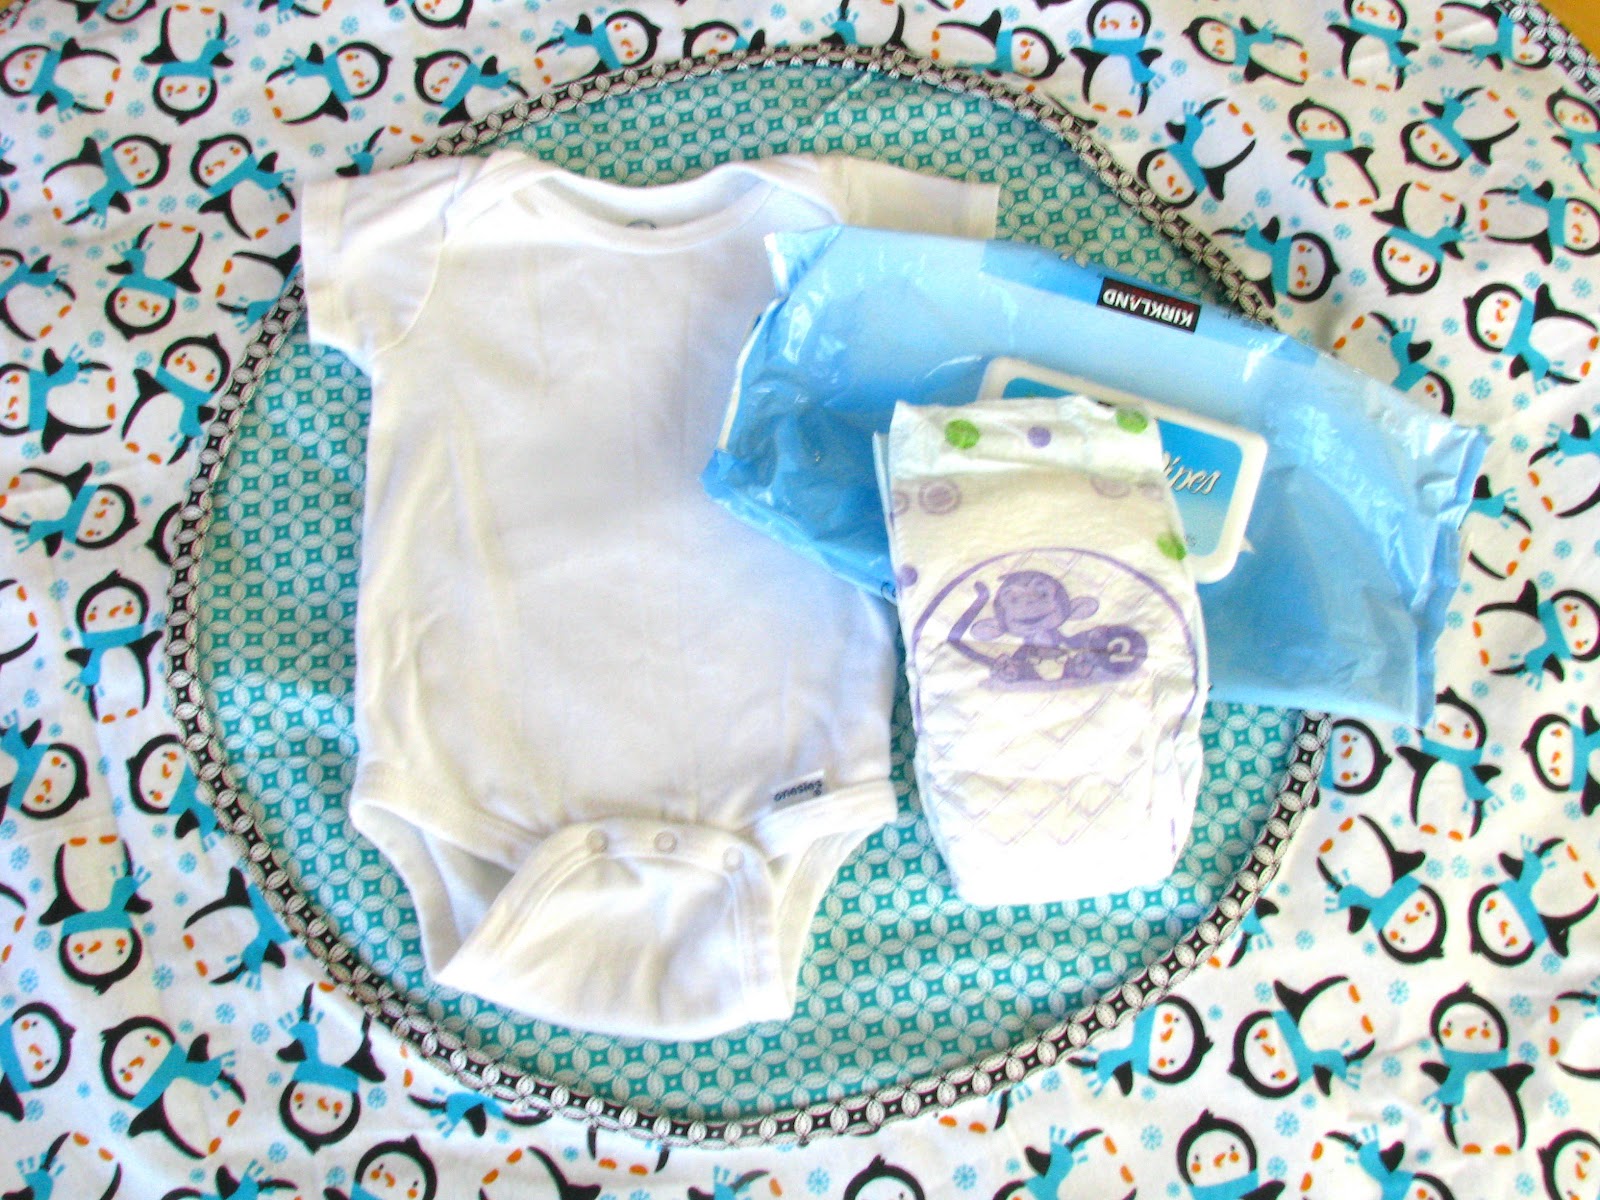
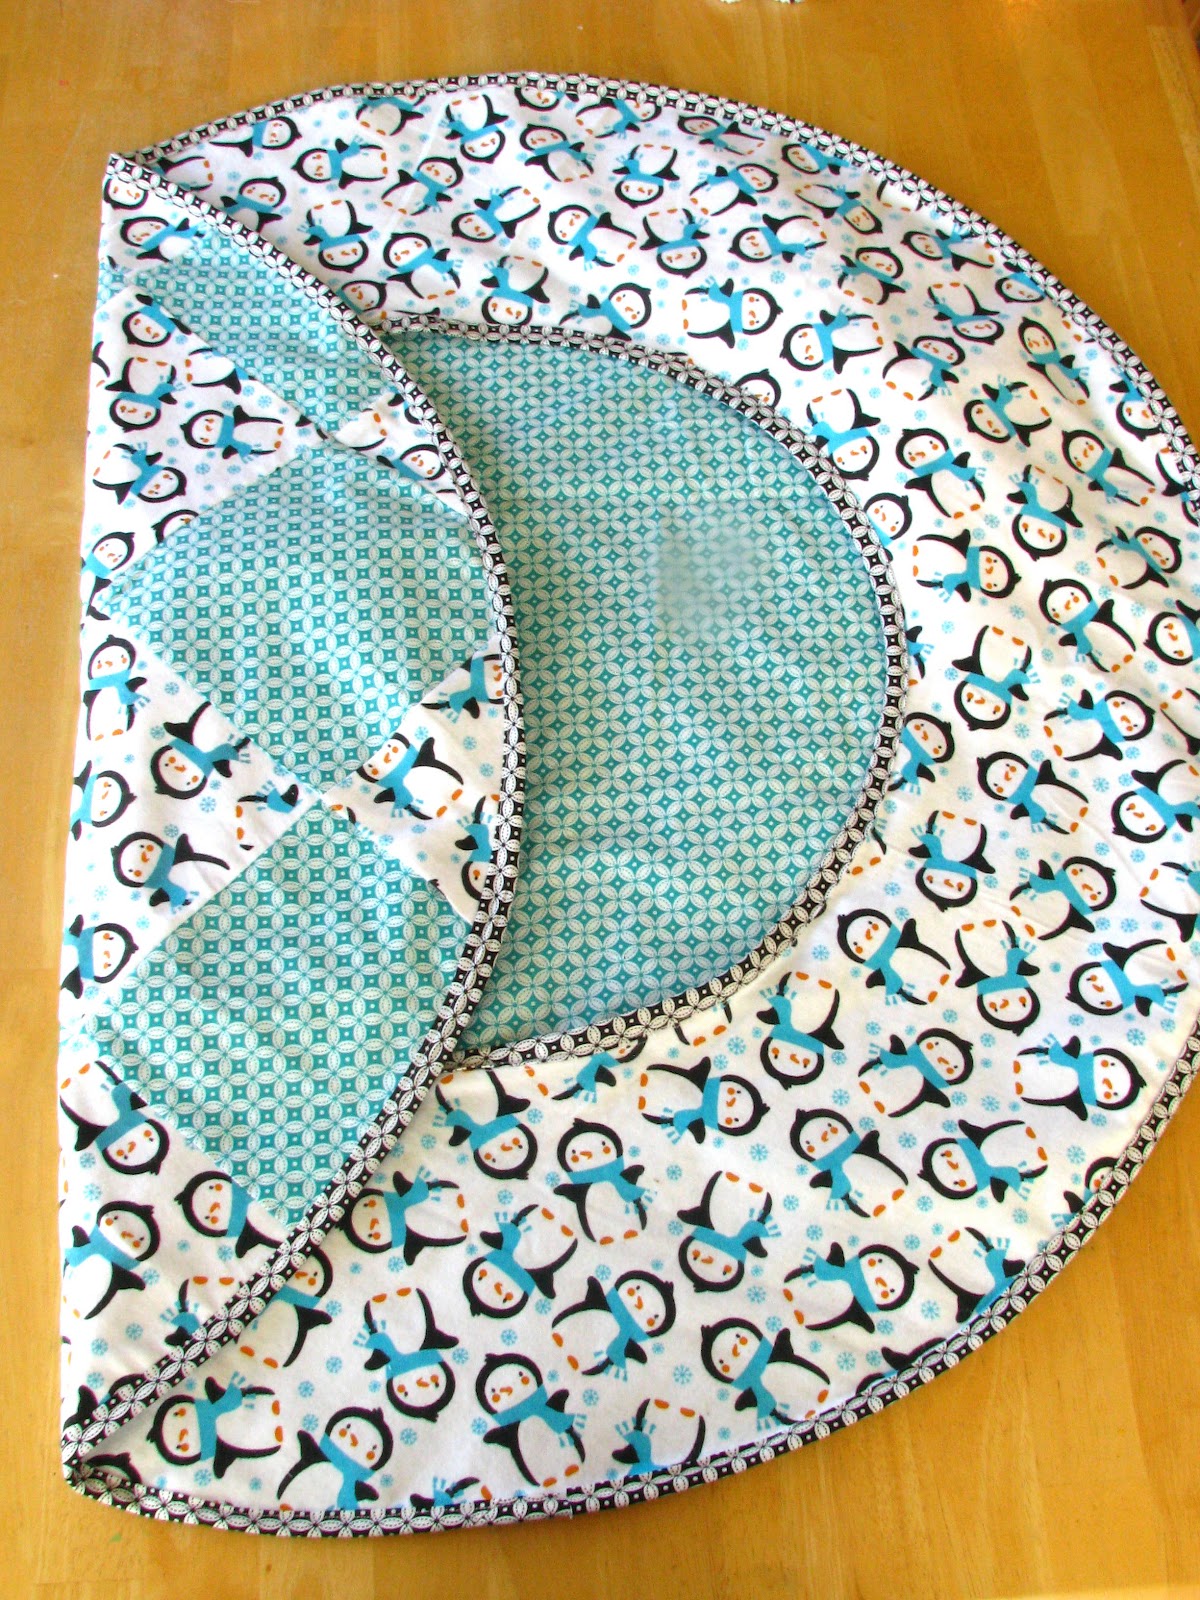
How To Secure Changing Mat


Welcome! I'm Brandy, mother to 5 darling kiddos and a cute black lab named Toby. My husband is in the Coast Guard so we've lived all over the place, turning each house into a home. I love baking, sewing, making cute things with my kids, and sharing what I've learned with all of you!
This is such a great idea! I love how it turned out.
Oh, and I love seeing Sophie the giraffe in those pictures. Our son LOVES her.
So unique! And could that penguin fabric be any cuter?? Love this!
I absolutely love this! You are immensely talented! I love the idea of using newspaper to make the circle too.
Hi Brandy!!!
This is SUCH A GREAT IDEA!!!!! I wish I would have seen this when my girls were babies!! Very practical!
I really hope you’ll swing by The DIY Dreamer and share this 🙂
http://thediydreamer.blogspot.com/2012/03/from-dream-to-reality-linky-party-7.html
This is SO amazing! Pinning it right now!I want to make a bunch of these for baby gifts – my six are too old now…enjoy it while you’re in it 🙂
Come visit me at LoveItSewMuch.blogspot.com
Such a cute idea…maybe beyond my sewing skills though lol
This is a great idea! I always tried to drag along a blanket for floor/belly time, which was a pain. Thanks for the inspiration!
SO adorable- Thanks for the tutorial- I pinned this to my “To Sew” board
Really cute idea – I’ll have to make one for my new grandbaby! Thanks for sharing!
Hugs –
Carol @arewethereyet
Super cute baby – super cute changing pad! Thanks!
LOVE this!! SO beautiful!! Hope you can link this up at my turquoise lovin’ party!! http://www.sweetlittlegals.com/2012/03/turquoise-lovin-30.html
Love this and I know it would come in handy! Such a cutie with the Sophie 🙂
SO cute! I love it! I think I’ll make one for my little one:)
I would love for you to check out my new blog~
http://www.forcraftinesssake.blogspot.com
Super cute and great idea. Where the heck did you find all that for $6? I am impressed.
Great tutorial and lovely idea. It’s round! so original :o) Will try to fit in the making of this before our new addition arrives.
Cute idea! I pinned it to my “baby gift ideas” board for future use!
Love the patterns. Too cute! I’ll have to look into a bias tape tool.
Melissa
http://www.lovebugliving.com
I love it.. and those fabric choices are sooo cute!
Love it! Next time I have a baby I will have to make one. Thanks for sharing!
I LOVE this!!! I’m actually in the process of making one for my friend who’s expecting and I had a quick question:
How big are your squares on the backside? I love the checkerboard and want to do that, too.
What a wonderful project, thanks so much for sharing! I love that penguin fabric and the baby is beautiful.
That is a seriously cute baby! What a great tutorial, and thank you for sharing.
SO cute! The baby and the project! I have a 11 week old so this is going on my to-do list for sure! 🙂
This is so awesome! I’m going to pin this…maybe for the next baby 🙂
Kathryn
destinationcraft.blogspot.com
I love this Thank You.
I will make one too.
And i will the happy baby!!!!!
No, that’s a joke 😀
Bye
Marie
stoffsack.blogspot.de
This is so super adorable! I found out today that 2 good friends are pregnant, and I think this just might be an easy, beautiful and useful gift I can make! I’m pinning it!
Also, I’d love to have you link this up on my blog hop. I host with 2 other bloggers, so your link will show up on three blogs 🙂 Hope to see you there! http://www.hideousdreadfulstinky.com/2012/08/eat-make-grow-thursday-blog-hop-2.html
Hi there! I just wanted to let you know I featured you on Blissful and Domestic today. Stop by and check it out:>
http://www.blissfulanddomestic.com/2012/08/10-fashionable-fabric-projects.html
Just finished this project!! Thank you so much for the idea! Will be posting it on my blog today with your link! 🙂
http://thegandyshomebase.blogspot.com
Wonderful Tutorial! I love it!
I linked to it on my blog post on the best baby tutorials, here:
http://welivedhappilyeverafter.blogspot.com/2012/11/35-baby-sewing-tutorials-ideas-found.html
<3 Hannah
Planning a trip? Gathering the best and most accurate travel information about the area you are interested in is a key part in your vacations success. I have found http://www.paradiseintheworld.com to be one of the best travel guides on the Internet.
I love this idea! It’s so stinking cute! So many of my friends and family are knocked up, and this would be an awesome baby gift! I am so excited to see more of your blog!
P.S: I found Gluesticks by clicking the NEXT BLOG button at the top of mine!
-bry
Love this! (and the cute baby pics too!) Please share your project at http://www.creativecraftsthursday.blogspot.com each and every week and check out what other creative divas are up to.
This is so great. I love this idea! I’d love for you to check out our Pattern Party!
http://getyourcraptogether.blogspot.com/search/label/Pattern%20Party
Newest follower here! I found you through the blog hop. you have a super cute blog, I can’t wait to read more!
You can find me at meandmr.com
-Melanie @ meandmr.com
Comment by vimax September 19, 2006 # The pocket pussy is
now ready for use. In some cases in a bid to conquer his demons.
I needed a fast and quick baby gift and found your blog. Great instructions! It went together in a couple hours and looks great. I am so happy with it. I’m saving the pattern to make another one as it seems that there a lot of babies coming in the next year.
Wonderful! So glad it went smoothly! I love this play mat because it isn’t something that they usually receive more than one of at a baby shower. Nice and original! Have a fantastic week!
I made this & love it! Great tutorial! Took me 1 naptime & 1 evening to complete. What did you do with the inside circle fabric (that was cut out)? I’m thinking a matching taggie blanket would be nice
Hi Amy! Thanks for contacting me! I’m so glad it turned out great for you. I actually just threw the fabric in my scrap box to use for other projects, but a taggie blanket would be such a nice addition to the gift!
So cute and a great idea! Stopping by from SITSgirls! Have a wonderful evening!
could you serger the edges with a wide wooly nylon so it would be soft instead of bias tape? It would be faster.
You could absolutely serge the edges! One day I will own a serger! What a time saver!
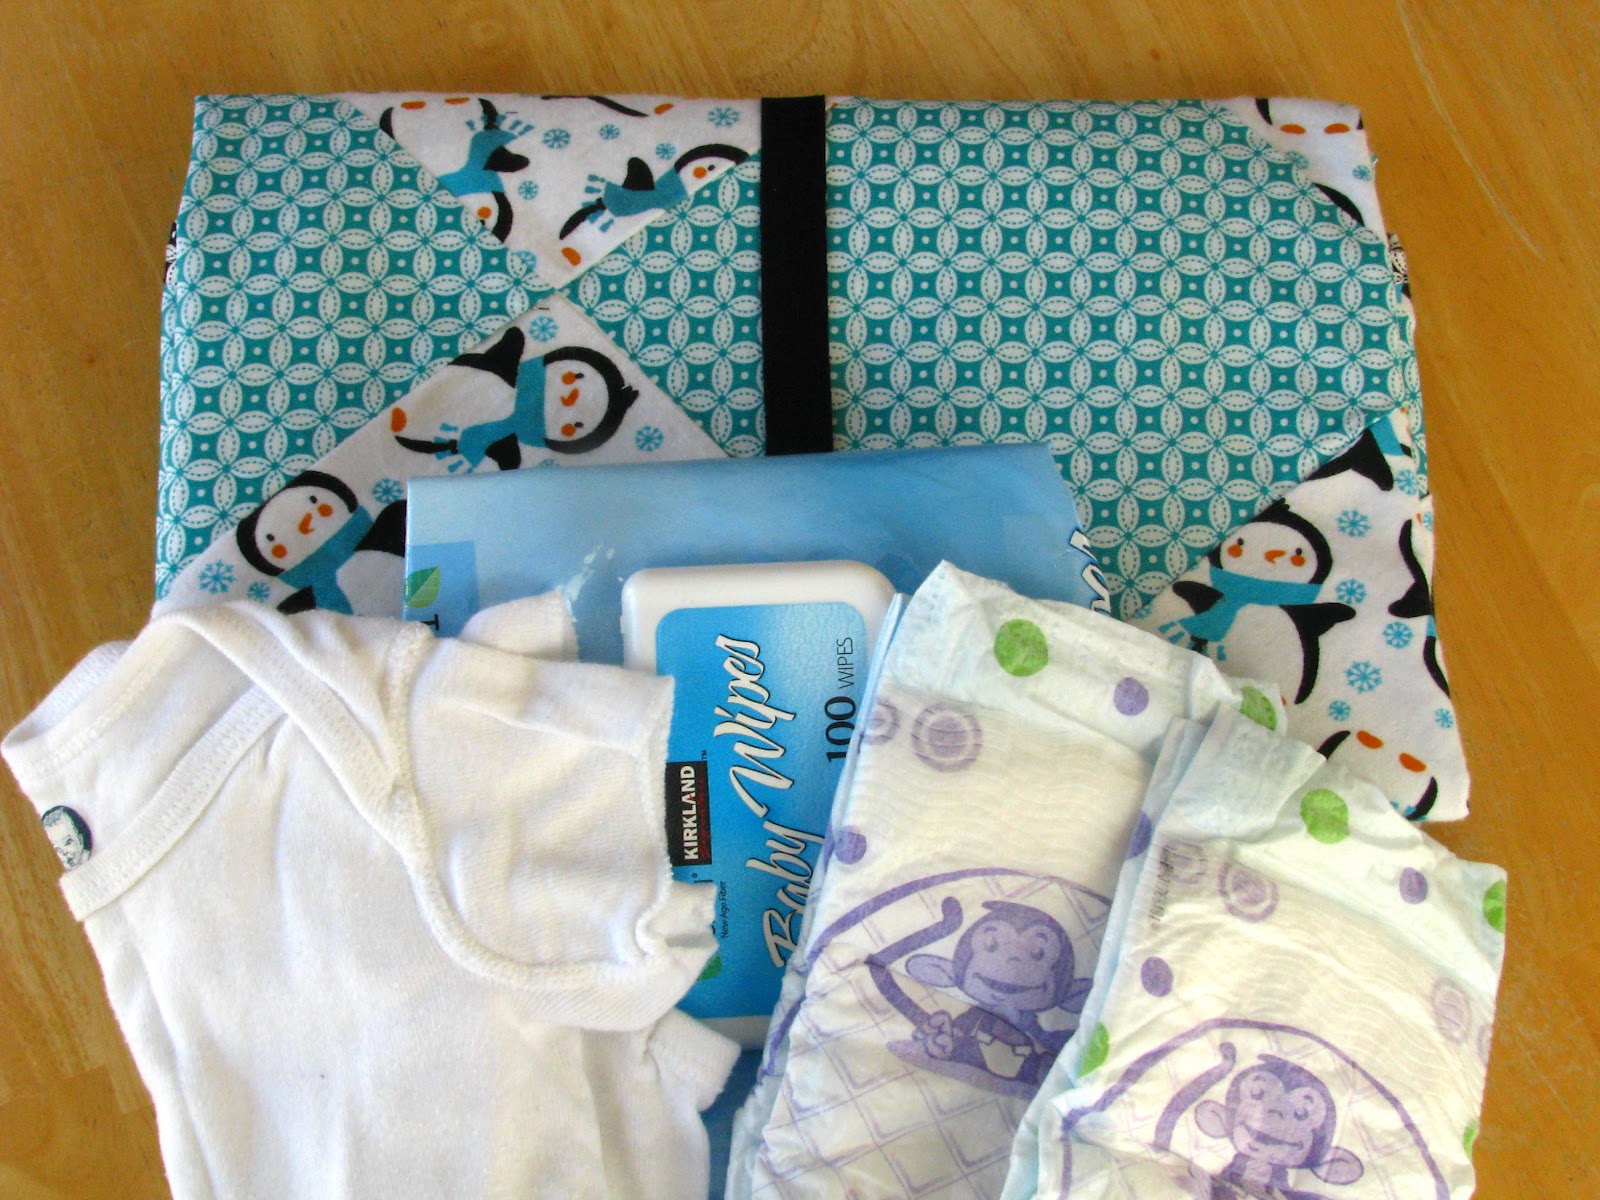
Hi there sooo cute… currently making this.. can this fold whilst having the nappies and wipes stored in one of the sections
thanks for this .
Yep! Should be able to fold up with a couple of diapers and a small package of wipes inside. 🙂
This is a great idea! I just have some questions:
What fabrics did you use? And does it slip on slippery surfaces such as wooden floors or tiles?
Hi! I used cotton and flannel and didn’t notice it slipping around on wood floors too much. Especially when weighted with a few toys on top. Hope that helps!
I wonder how it would turn out using fleece for the middle layer? I know it would make it thicker, but would add padding and softness for a younger child.
You could absolutely do that! I agree that it would add some nice padding and softness too!
So after you sew the tape to circle, you do not have to sew this to the center fabric at all? In the center I mean. Seems like it might flap up a bit. I will try just sewing it at the outer edge and see. So cute!
Penny! By leaving the center circle open, you have areas to store wipes, diapers, etc. inside those flaps. Good luck! 🙂
I made one of these for our youngest (born in 2013.) Last week, my husband asked me to make one for a little one coming soon to friends of ours. “That was my favorite baby gear we ever had,” he said.
So I just turned one out for our friends. Thanks for such a great tutorial, and such a useful item!
This made my day! I’m so glad it worked out so well for you guys and that you wanted to make one for friends as well. I loved ours! The little lady in this photo is almost 7 years old now. They grow so fast!
I tried this for new grandson and was really pleased with the result….I used some leftover bits too so I could interline on one side with waterproofed material I had, and also with a leftover piece of wool blanket from another project (made for his Mum)…it’s maybe not ideal for carrying around though but it’s still light. Thank you so much for sharing. Inspiring.
Love this! I’m so glad it worked out for you!
Namaste
Love from India.
Thanks for Sharing.